In today's world, everyone loves the idea of having all the information, even the small details! Check out this guide to make sure you covered everything!
Where should I go?
Let's take this Jurny together!
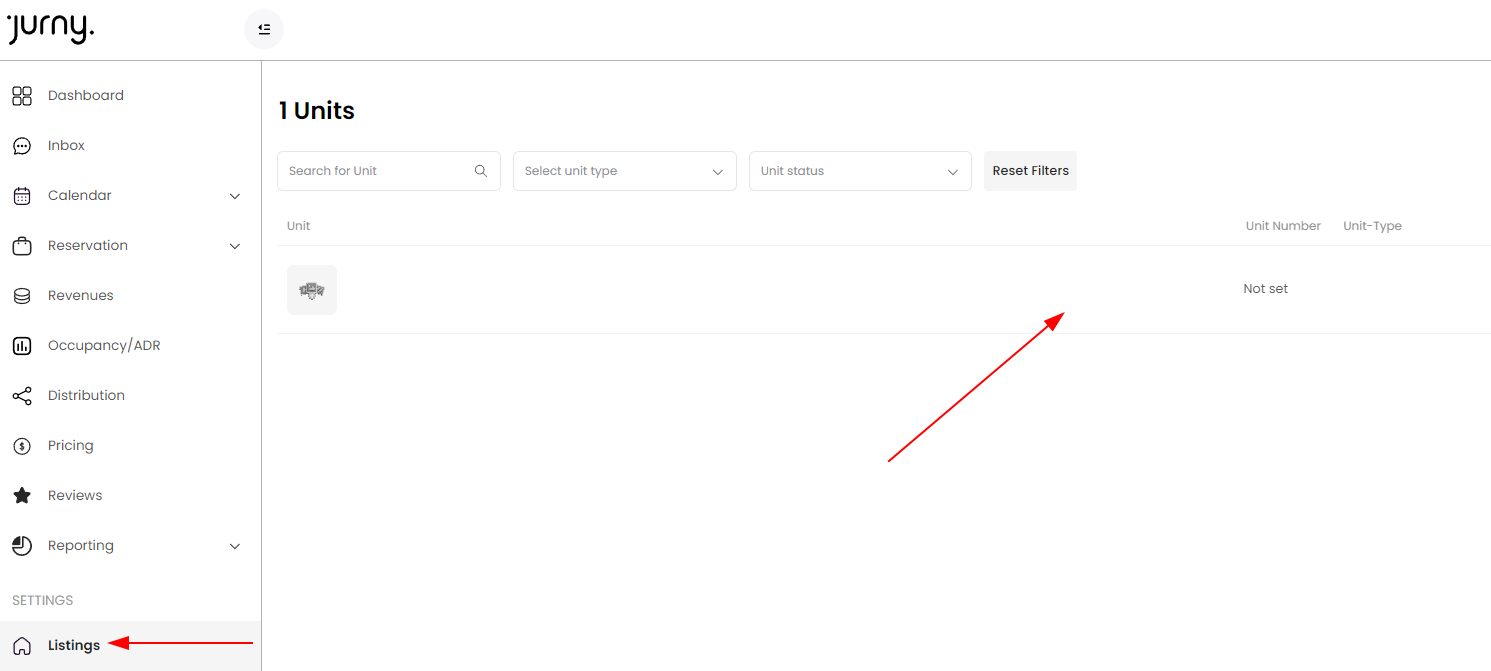
Under Settings > Listings, click the listing you want.

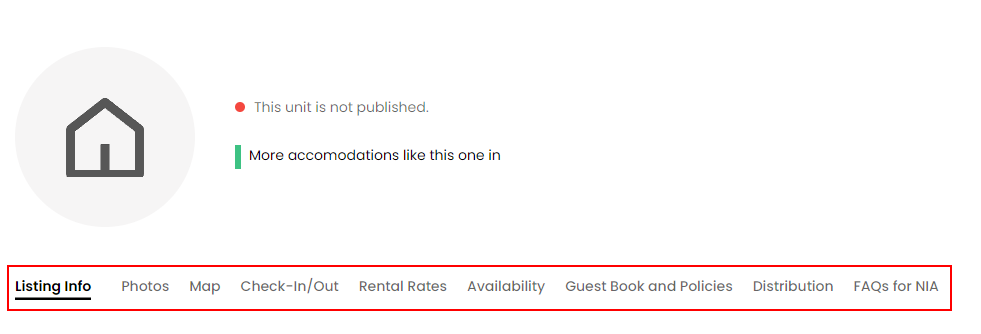
From there, you will see multiple sections that are explained below.

- Listing info: This is where all the Basic Details will appear. Things like the unit name, unit number, property type, unit floor, size, access code (in case you don't have smart locks), number of guests allowed, a general summary, and a detailed description. You will see the Rooms Setup. This includes the unit type, the number of rooms, the amenities, and general information about the transportation and the neighborhood.
If you want to have your Airbnb listings in a different language, use our Translations feature at the end of this section!
- Photos: Here's where you have the opportunity to delight your customers with outstanding photos!
Usually, these pictures will be populated automatically by your Airbnb importing process. But if you want to add more pictures or replace them, the optimal size is around 500-1000KB.
While your customers will be able to see all the photos if they check the listing, browsers will share the first six pictures! Take this into account while organizing them.
- Map: Here's where you share the address. You can show only the general area to anyone searching for your place or you can share the exact location, that's up to you! You can also describe the area if you want. Your guests will appreciate this!
- Check-In/Out: Let your guest know what would be the check-in method (are you receiving them? Do you have any smart locks?), all instructions, and the time! The same applies to the check-out! Be as detailed as possible so you don't leave any vague explanations and your guests fully understand how you want things to work!
Did you know that Jurny can send you smart locks? Reach out to your onboarding rep and we will get you sorted!
- Rental Rates: This is the place where you enable Wheelhouse! Also, here's where you will be able to change the rate plan, the currency, the nightly rates (in case you don't have WH), discounts, and additional charges (cleaning fee, pet fee, extra guest fee, and so on). Do you want to add taxes or a security deposit? This is the place.
If you enable taxes, make sure to enable the toggle "Do not push this tax on Airbnb.", otherwise, your guests will be double-charged.
Not sure what Wheelhouse is? Discover how powerful the tool is here.
Learn how to set up Wheelhouse by following this step-by-step guide.
- Availability: Share when your listing will be ready to be booked! In this section, you can specify the advance notice, the preparation time, the availability window (we recommend 365 days), and the restricted check-in/out days, also, you can sync the calendar! And the cherry on the cake! You can also establish the trip length!
- Guest Book and Policies: This is the favorite section of your guests! This is where they can get the Wi-Fi network and the password. Also, your favorite section! You can add the House Rules from here! You can allow or prohibit pets, events, smoking, vaping, photographing, and/or filming, and you can set the additional rules, the quiet hours, and so on! In addition to that, here's where you add the cancelation policy and other policies, and to which Stripe account the payment from this unit goes.
Do you want to know more about Stripe? Check out their page here.
Set up Stripe by following this step-by-step guide.
- Distribution: This is where you can set the distribution channels of your unit! Also, from here, you can refresh the information in case you need it!
- FAQs for NIA: NIA is our AI bot! NIA will learn from user interactions and will improve its responses day by day. The FAQ section won't be displayed on the Listing Channel, which means, your customers won't be able to see the FAQs that you add here, but if they have a question, NIA will be able to respond to them. Very powerful, right!?
If you want to share FAQs with your customers, you can do this by using our automated messages!
Set up your automated messages by following this step-by-step guide.
Any questions? Reach out to our support team at support@jurny.com
