5 - Set up your Booking Policy
Booking policies are a set of rules that control how reservations are created, paid, and confirmed. They help you manage availability, automate payments, define booking behavior, and ensure reservations follow your business rules.
Quick Navigation Index
To easily navigate through this guide, click on any of the sections below to jump directly to the information you need:
What Are Booking Policies?
Booking policies are the rules and guidelines that control how bookings behave in your account.
They allow you to:
-
Control when guests can book
-
Define how payments are processed
-
Assign the correct Stripe account
-
Set preparation and advance notice rules
-
Control quote behavior and expiration
-
Require guest information for direct bookings
Tip:
Booking policies also ensure payments are sent to the correct Stripe account, which is critical if you manage multiple businesses or payout destinations.
Before You Get Started
Before creating a booking policy, you must complete the Booking & Payments setup.
Make sure the following are already configured:
-
Payment Schedules → (link to guide)
-
Merchant (Stripe account) → (link to guide)
-
Rental Contract → (link to guide)
Note:
Even though each OTA has its own cancellation rules, booking policies are mandatory for Direct Bookings and must be completed before going live.
Where to Create a Booking Policy
-
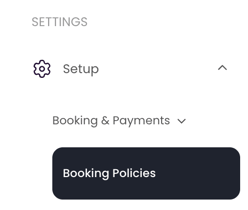
Go to Settings
-
Click Setup
-
Select Booking & Payments
-
Click Booking Policies
-
Click Add Booking Policy

Booking Policy Sections Explained
Information
Name
- Internal name for your reference
- You can edit it anytime
- Guests will not see this name
Example: Standard Direct Booking Policy
Payment Settings
Merchant
-
Select the Stripe account where payments will be sent
-
This must be a connected merchant account
Automatic Payment
-
When enabled, payments are automatically processed
-
When disabled, payments must be handled manually
Booking Settings
a. Preparation Time
-
Defines how many days you need between bookings
-
Prevents new check-ins until preparation time is complete
Example:
If set to 1 day, a guest cannot check in the day after another guest checks out.
b. Availability Window
-
Controls how far into the future guests can book
-
Recommended setting: 365 days (1 year)
c. Advance Notice
-
Defines how much notice is required before booking
-
Example:
-
Advance Notice = 2 days
-
Today = 1st
-
First available check-in = 3rd
-
Default Quote Settings
Rental Contract
-
Select the default rental contract for direct bookings
Payment Schedule
-
Select how and when guests are charged
Online Booking
-
Enables bookings through:
-
Your own website
-
Jurny Booking Engine
-
Online Payments
-
Allows guests to pay online via quotes
Quote Expires
-
Defines how long a quote remains valid
-
Once expired, the guest can no longer pay
Quote Hold Dates
-
Defines how long dates are held while a quote is pending
-
Prevents other guests from booking during that time
Automatically Reserved On
-
Determines when the system marks dates as fully reserved
Recommended Option:
Payment in Full — ensures dates are blocked only when fully paid.
JurnyOS New Reservation Checks
These apply only to Direct Bookings.
Require Renter Address
-
Guests must provide their address
Require Renter Phone
-
Guests must provide a phone number
These checks improve guest verification and data accuracy.
Final Step
That’s it! Your booking policy is now ready and can be assigned to listings.
With booking policies in place, you’re one step closer to:
-
Automating reservations
-
Securing payments
-
Going live with Direct Bookings
If you need help or have any questions, don’t hesitate to reach out.
Contact your Customer Success Manager or our support team at support.jurny.com – we’re happy to assist.