Quick Navigation Index
-
Why Create a Test Booking
-
Before You Start
-
Option 1: Create a Test Reservation (No Price Required)
-
Option 2: Create a Quote (Best for Testing Pricing & Fees)
-
Tips for Testing Automations and Payment Links
Why Create a Test Booking
Creating a test booking is a great way to verify that everything in Jurny is working the way you expect.
A test booking can help you check things like:
-
Automated guest messages
-
Payment links sent to guests
-
Reservation details and workflows
-
Custom fees and pricing calculations
Depending on what you want to test, you can create either:
-
A Reservation – if you just want to generate a booking and trigger automations
-
A Quote – if you want to test pricing, custom fees, or payment links
Before You Start
When creating a test booking, it's important to use your own name and email address as the guest.
This allows you to:
-
Receive guest emails and message templates
-
Test payment links
-
Verify the guest experience
Tip: Using your own email lets you see exactly what your guests will receive.
Create a Reservation from the Reservations Page
-
Navigate to the Reservations tab in your dashboard.
-
Click Add New in the upper-right corner.
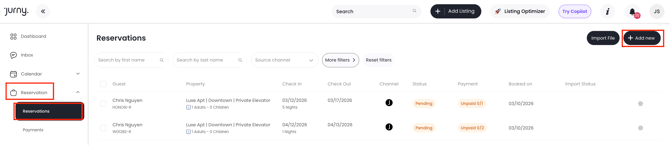
A New Booking popup window will appear where you can begin creating the booking.
Creating a Reservation from a Calendar
You can easily create a reservation directly from the calendar, too.
-
Click on your desired check-in date on the calendar.
-
A small menu will appear.
-
Select “New Reservation.”
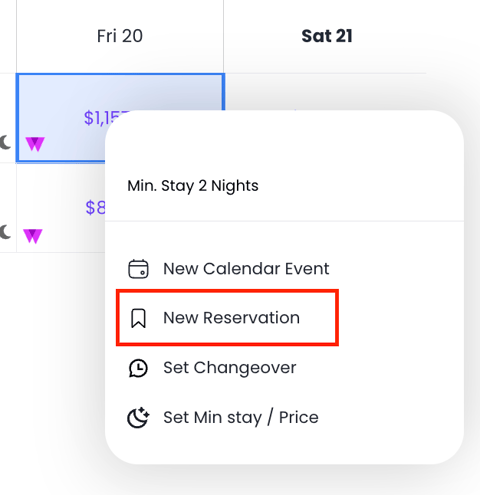
A New Booking popup window will appear where you can begin creating the booking.
2. Select Listing, Occupancy, and Dates
Inside the booking popup:
-
Select the Listing you want to book.
-
Enter the Max Occupancy for the reservation.
-
Choose the Check-in and Check-out Dates.
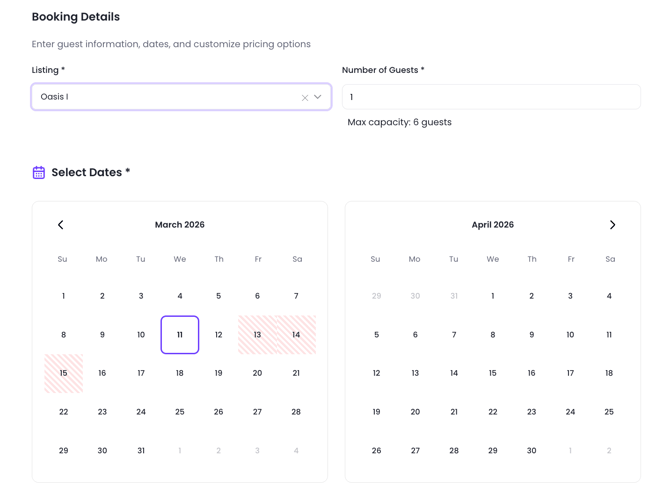
The red slashed dates on the calendar signify dates that aren't available anymore.
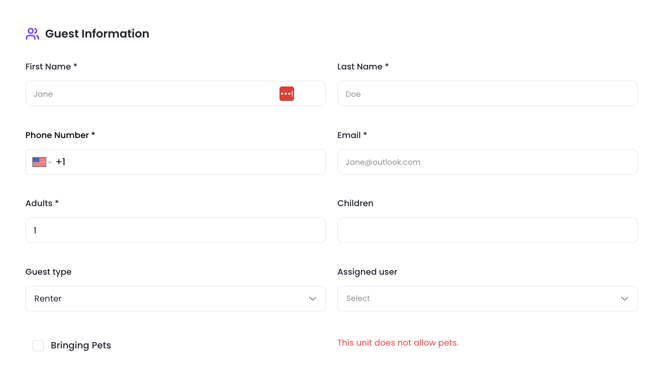
3. Add Guest Information
Enter your personal details here to make sure that you will receive the quote.
-
Guest Name
-
Email address
-
Phone number
- Number of Adults and Children
- Guest Type will be Renter by default, you can change this to another type if necessary.
- You can also assign the reservation to a member of your team by choosing an Assigned User
4. Decide Whether to Include Pricing and Summary
You will see a checkbox labeled “Include Price and Summary.”
-
Checked → Pricing details and payment options will be included in the booking or quote. This is a great option if you want to test the quote and see how the payment link works.
-
Unchecked → The booking will proceed without pricing information. This is a good choice if you only need to test if your automatic templates are working.
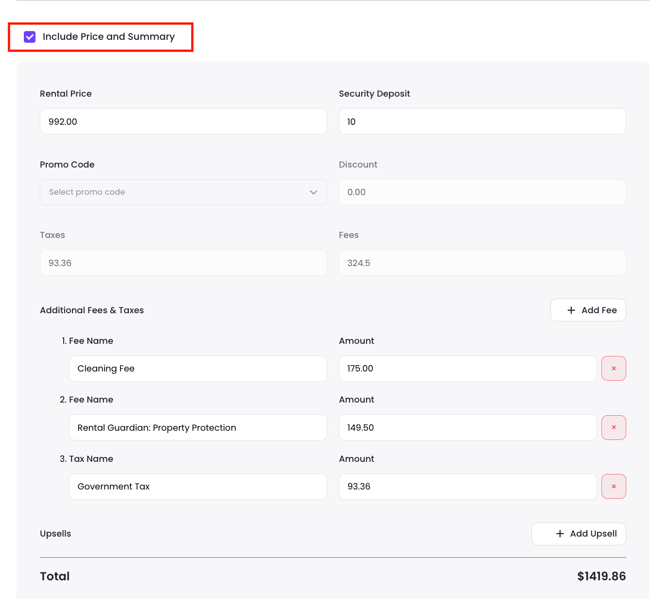
Tip: This option works best if you need to collect payment from the guest using a payment link or if you need the finance breakdown included in the booking for reporting purposes.
Customize Pricing, Fees, and Upsells (If Enabled)
If Include Pricing and Summary is enabled, you will have additional options:
Adjust Pricing
You can modify:
-
Rental price
-
Cleaning fees
-
Taxes
-
Additional fees
Apply a Promo Code
You can also apply a promo or coupon code directly within the booking to adjust the final price for the guest.
Add an Upsell
You can also add optional upsells to the booking, such as:
-
Early check-in
-
Late checkout
-
Extra services
-
Add-ons offered to guests
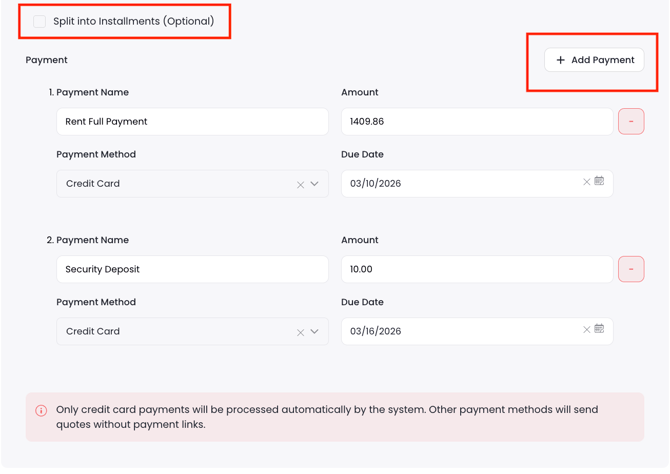
6. Split Payments into Installments (Optional)
If you want the guest to pay in multiple payments, enable Split into Installments.
-
Tick the checkbox “Split into Installments.”
-
Enter the number of payments by clicking the "Add Payment" button.
-
Add a name for the payment, then the amount for each installment.
-
Set the due date for each payment.
-
Select the method of payment.
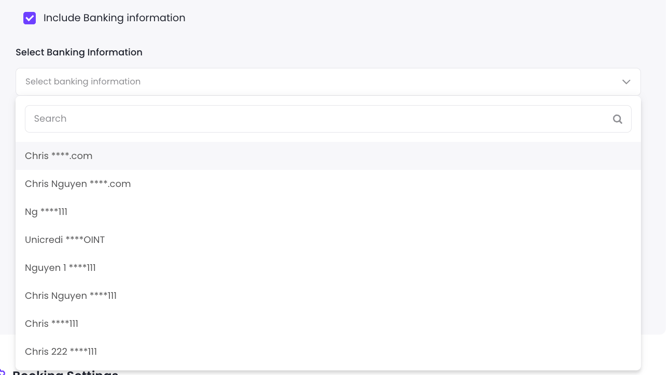
If you select Bank Transfer as the payment method, you'll have the option to include your bank information for the guest. You can either select from the Select Bank Information dropdown of your saved bank information or add your bank details manually.
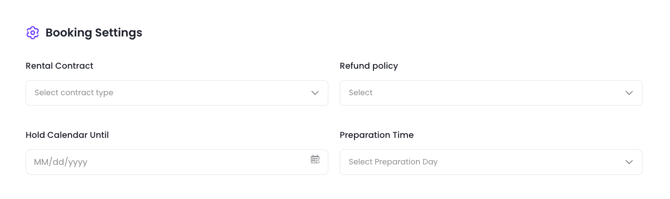
7. Configure Booking Settings
Next, complete the Booking Settings section.
Select the following:
-
Rental Contract
-
Refund Policy
-
Hold Until Date (how long the dates will be reserved for the guest)
-
Preparation Time
If the Include Pricing and Summary check box is NOT selected, you will proceed to Booking Settings immediately after adding the guest details. If the checkbox is selected, you will first configure pricing, fees, upsells, and payment settings before reaching this step.
8. Add CC Emails and Email Settings
If Include Pricing and Summary was enabled, the next step after Booking Settings allows you to manage if you want the quote to be sent to the email in the reservation and if you want to add additional emails to be CC'd on the quote.
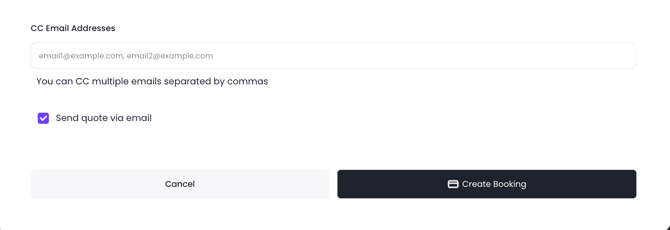
The option “Send Quote via Email” is enabled by default. If you do not want to send the quote via email, make sure to untick the Send Quote via Email checkbox before creating the booking.
9. Create the Booking
Once all information is completed:
-
Review the booking details.
-
Click Create Booking.
Your reservation or quote will now be created in the system.
Reservation Confirmation
Here's the deal – creating the reservation won't automatically block your calendar. If you are collecting payment for the booking using the payment link they will receive when you send a quote, then, once the payment has been processed, the booking will be marked reserved and paid automatically.
If you don't need to collect a payment for the booking, then you'll need to confirm it first to make sure your automatic templates are triggered on the test booking.
To confirm it, click on the reservation that was created in your calendar. From there, click Accept Reservation.
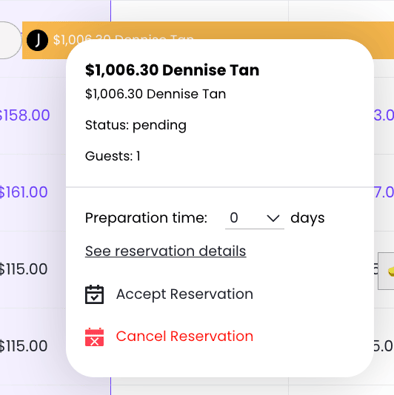
Voila! Now your calendar is blocked!
Tips for Testing Automations and Payment Links
When running a test booking, keep these best practices in mind:
-
Always use your own email to receive guest communications.
-
Use Quotes when testing pricing, fees, or payment links.
-
Use Reservations when testing workflows or automations.
-
Check your inbox to confirm templates are working correctly.
Caution: Remember to cancel test bookings afterward so they don’t affect your calendar availability.
If you need help or have any questions, don’t hesitate to reach out. Contact your Customer Success Manager or our support team at support.jurny.com – we’re happy to assist.